 |

|
|
|
|
||
Oil & Filter Change In A Gallardo
| Changing the
transmission fluid is another simple DIY (do-it-yourself) task that
the average Gallardo owner can perform. It's not much more difficult
than changing the engine oil. Standard disclaimer: You should not attempt this unless you are comfortable with working on your car. These instructions are not endorsed or approved by the manufacturer and any thing you do is at your own risk. Also, this procedure has only been done by the author on a manual 6-speed car. I assume the process is the same on an e-gear, but I'll leave that to others to confirm Step 1: Round up the necessary tools.  1/2" Socket wrench 1/2" extension(s) (16 inches min, 18-20" preferred) 22mm socket 14mm hex bit socket (a 9/16" will also work) funnel 18 inches of 1/2 ID plastic tubing 4 quarts GL-4 transmission fluid drain pan floor jack a coat hanger or similar stiff wire For the extension, you can get by with a 10" and 6" back-to-back, giving you a total of 16 inches, but an 18" or longer extension will make the job easier. You might also want to have a breaker bar handy if the previous mechanic working on your car torqued down the fill plug. I had trouble finding the 14mm bit socket. The normal Craftsman tool stores don't carry anything this large. I did find a set at AutoZone, so try your local car parts store first  I used Red Line MTL 75W80 GL-4 transmission fluid upon recommendation from a Lambo tech. Stay away from GL-5 fluids - the additional additives in these are corrosive to the "yellow metal" synchro cones in the gearbox. Step 2: Locate and remove the fill plug. You may want to do this later in the process, as leaving the fill plug in place will slow the rate at which the fluid drains out of the gearbox, lessening the potential mess on the floor. However, I suggest you do this first. If you have any difficulty loosening the fill plug you can abort the process with the car still drivable. The fill plug is on top of the transmission housing directly behind the engine block. Open the engine bonnet, stand behind the car, and look down between the throttle bodies to locate the filler plug. There is another similarly-sized fitting just to the left of the fill plug. This is the bleed fitting for the hydraulic clutch - leave it alone!. See the picture below. 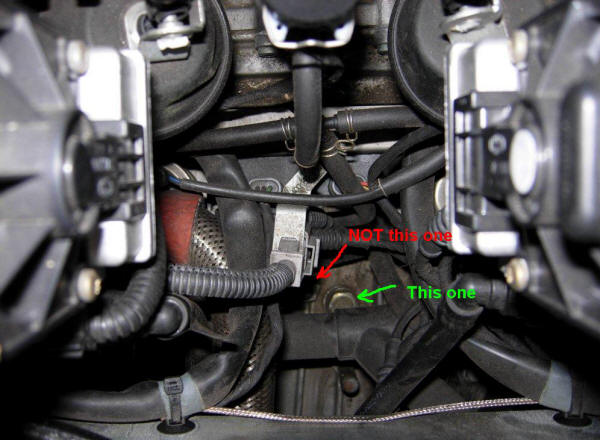 There is a coolant hose directly above the fill plug that will make things a bit difficult. You can press it out of the way to get the 22mm socket on the fill plug.  You may need a breaker bar to get the fill plug loose. Once the fill plug is loose, you need to retrieve it. This is the most difficult step, since there is very little room to fit you hand down through the maze of hoses. You may want to temporarily remove the electrical connector (shown) from its mounting bracket. 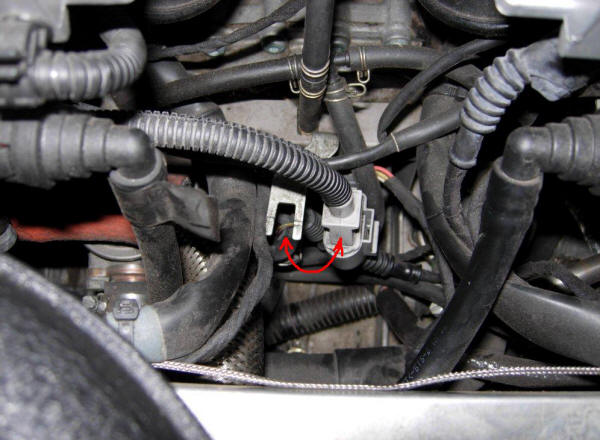 The fill plug has a thin washer under it. This will likely fall off the plug as you retrieve it. I bent a small hook onto the end of a length of wire (a coat hanger will suffice) to retrieve the washer. 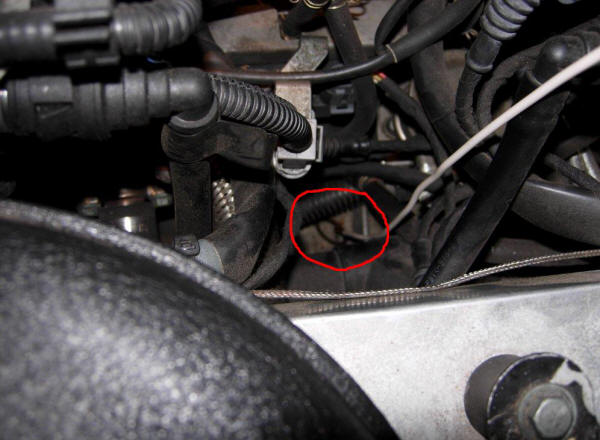 If you've been successful, you should have a fill plug and washer: 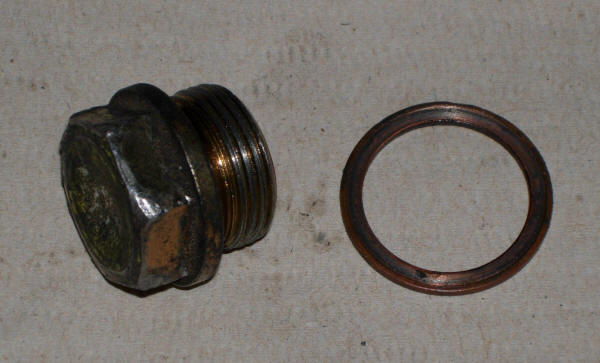 Step 3: Draining the fluid from the gearbox. The drain plug is on the bottom of the gear box, just inside of the frame member. Use the 14mm hex bit (with a socket wrench) to loosen the plug. Have your drain pan handy. If your drain pan will not fit under the car, you may need to jack up the rear end a bit to get more clearance. Position the floor jack on the frame member immediately underneath the gearbox. 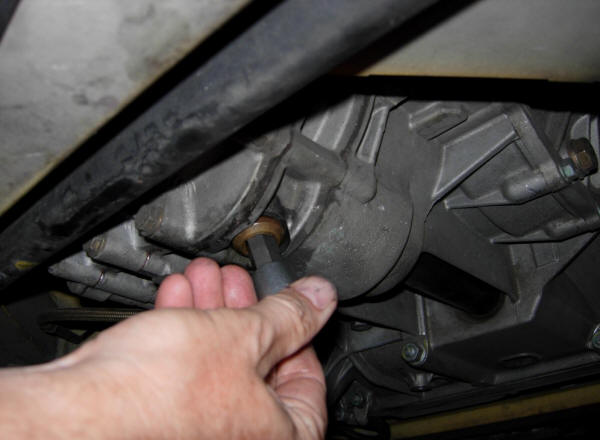 Drain the fluid. The fluid is the consistency of thin motor oil. It comes out quite fast. Inspect the magnetic end of the drain plug for metal filings. A small number of flakes can be expected. Large pieces are bad news. Clean these off and reinstall the drain plug once the fluid has all drained out. 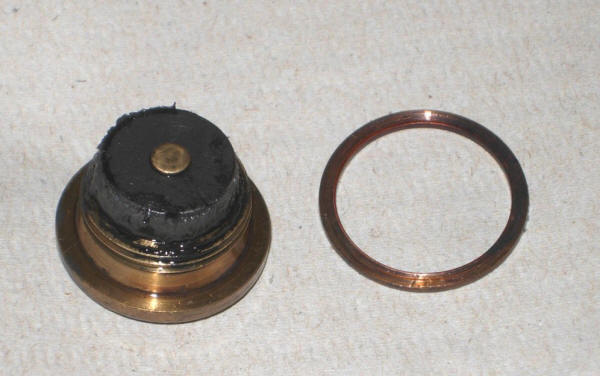 Step 4: Add the new fluid. Insert one end of the plastic tubing into the fill opening. Once you think you've found the hole, inspect it with a flashlight to make sure the tubing is actually in the opening and not somewhere else on top of the gearbox. Then twist the tubing a couple of turns to "screw" it further into the transmission opening. This will help keep it from coming out at the wrong time.  Insert the funnel into the top end of the tubing. I found it convenient to wedge the funnel in place with the socket wrench extension bar, as shown below. 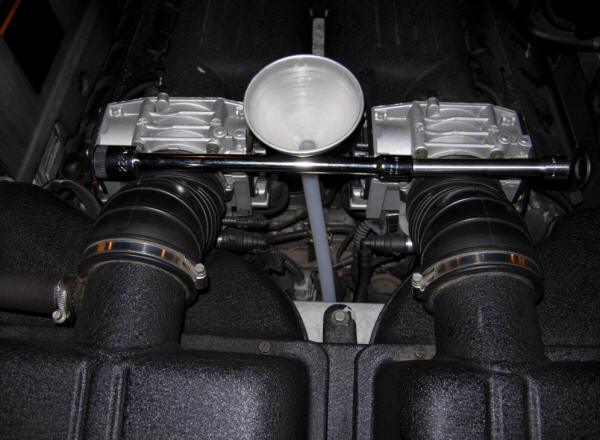 Now add the fluid; four quarts are required. Remove the tube when done. 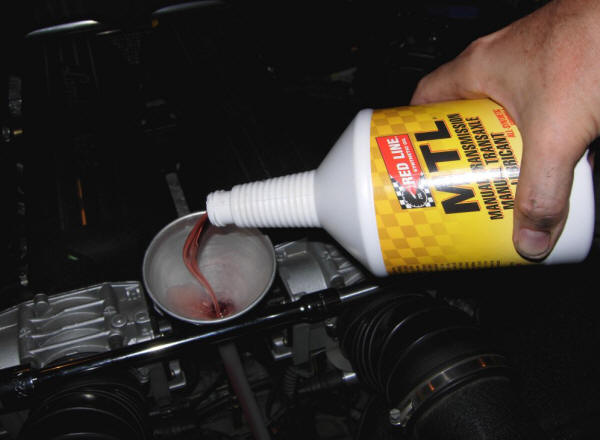 Step 5: Reinstall the fill plug. Given the problems I had retrieving the fill plug in step 2, I thought it would be worth while to form a tool to lower the plug into position. Use the other end of your wire to form a "hook" of the proper size to hold the fill plug. 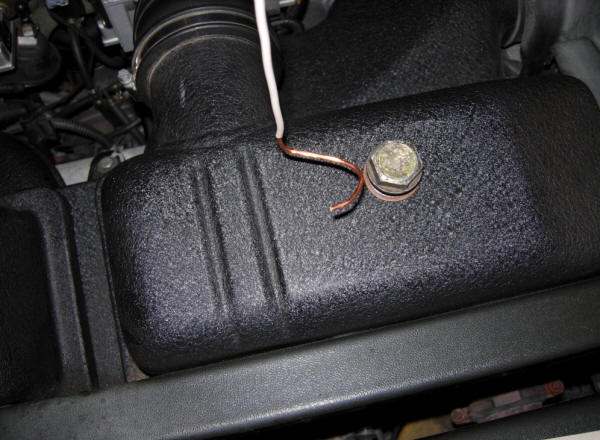 Then lower it down until it's seated on the opening, carefully remove the tool without disturbing the plug, reach down with your hand and give it a few twists to start the threads. Finish up with the 22mm socket wrench. 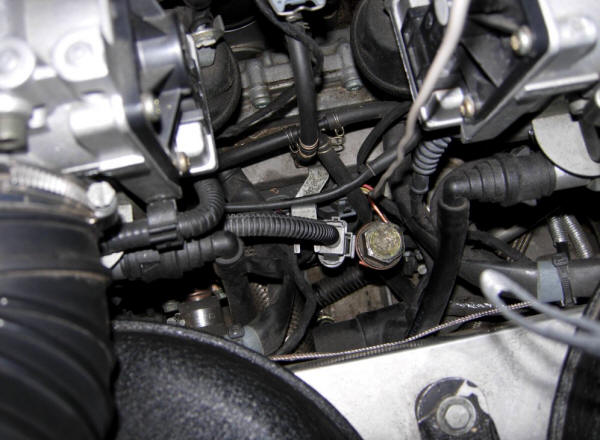 This completes the process. Check for any leaks over the next day or so. One Final Thing: Forgot to mention you need to clean the trans filter! It is held in place by a small (8mm or 10mm) bolt, and just slides out. It's on the drivers side almost under the lower rear diffuser. There will be some small red chips, that's normal. If you find big metal pieces, you got a problem. First, remove the two Torx screws that secure the left side of the rear diffuser to the lower frame cross member. You will need to pull the bottom of the diffuser down slightly to get room to remove the filter. The filter is held in place by an 8mm hex-head bolt. 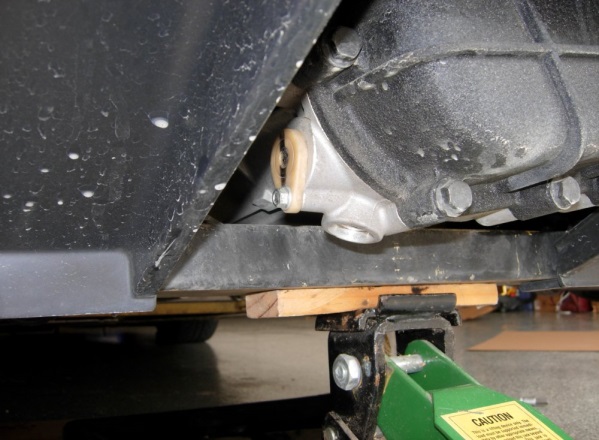 Place a catch-pan or suitable pile of shop towels under the gear box, you will get about a cup of transmission fluid on the floor if you don’t. After removing the bolt, rotate the filter slightly back and forth while pulling to free it from the gear box housing. You may need to pry gently with a small screwdriver to get it started. 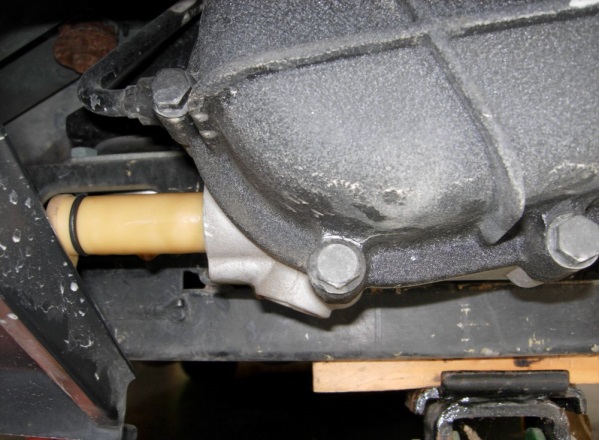 As you remove the filter from the gear box, you will need to gently pull down on the bottom edge of the rear diffuser to provide clearance. 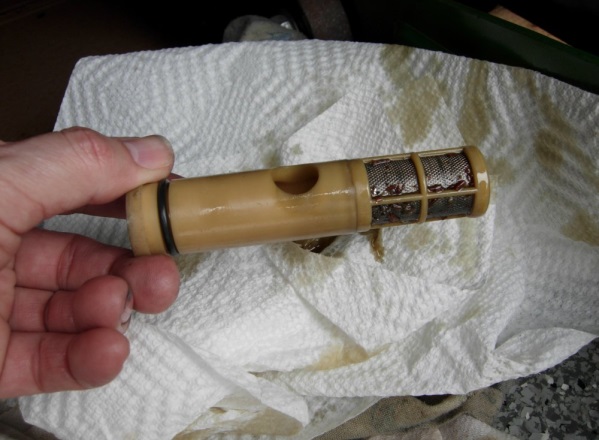 Clean the filter and reinstall. If you use a solvent, lubricate the O-ring with some transmission oil before reinstalling. Use care when reinstalling the 8mm retention bolt – do not over tighten. The red chunks are bits the gasket compound applied the gear box housing during assembly. The newer the gear box the more of this stuff you may see. The shiny bits are of more interest. Also, see the picture below. The arrow indicates the level checking plug. It would almost be advised to fill trans with 4.25 qts, and then set the car on a level surface, and pull the plug with the red arrow. Wait until the excess fluid comes out. Reinstall plug, and you now have the perfect amount of fluid in the trans. The rear fluid will make you want to puke when you drain it. The front fluid will look brand new. For the front. The front diff level indicating plug IS the fill plug. Just keep filling until fluid comes out, and you're done. 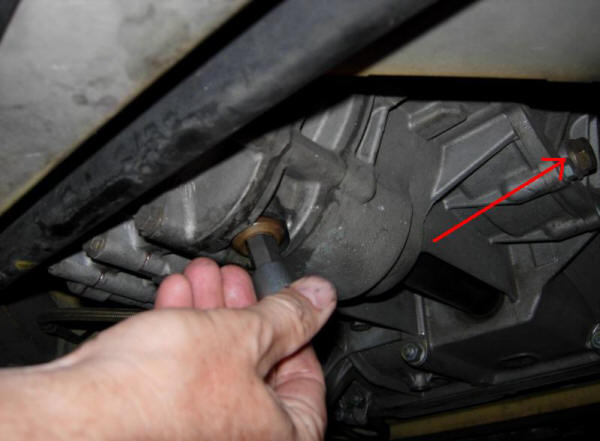 |