|

|
|
|
|
||
Installing a Navigational System in a Gallardo
I immediately considered installing a navigation system. This was a reasonable complex task but well worth the effort. I have written a detailed update here for those that may be considering doing the same thing. Again it's not for everybody but if you chicken out you can easily re-install the OEM radio and sell the NAV unit on eBay. The process involves removing the OEM radio, adding a cable connector/converter, an antenna adaptor, the NAV unit itself, a wheel speed sensor and having a custom bezel cut out of plastic. Introduction To NAV Units. There are over a dozen major brands of Navigation units available these days on the web and in most auto stores. All these systems work off satellites rotating around the earth in practice orbits and sending very accurate time delayed signals. You need signals from at least 4 satellites at a time to get an accurate position. The first question is which system to use....
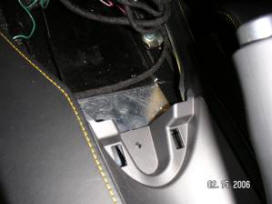
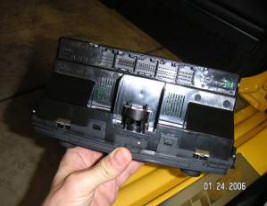
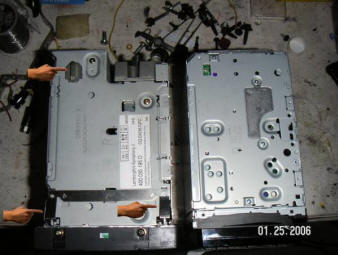
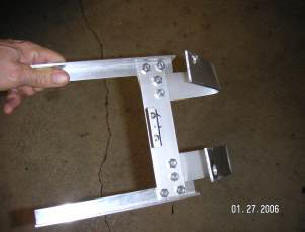
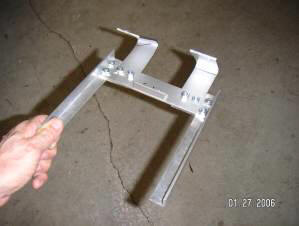
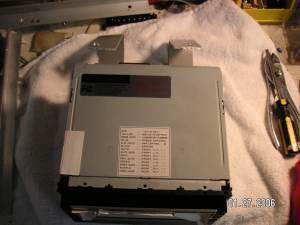
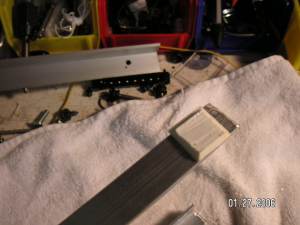
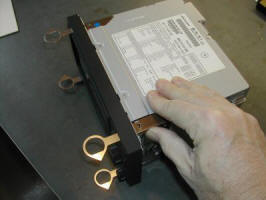
Installing The Navigation System. Now comes the hard part. Getting the radio itself out. Figure 8 shows the Audi/Gallardo Symphony II radio side by side with the NAV system we will insert. It took a lot of time to figure it out (without a manual) but the radio simply slides right out. There are two spring clips near the front that press in with a blade as you pull the whole unit forward (see below, for a proper Audi radio removal tool to do this). At the back there is a metal knob that moves along a rail as you slide the radio out. These clips and metal knob are indicted in figure 8. That's the good news, the bad news is that there are no knobs or clips on the Eclipse system. Fortunately the width and length dimensions of the Eclipse are identical to the Audi unit. I made a simple aluminum frame that the Eclipse unit can sit into (figure 9,10,11). At the base of this frame I stuck on a rubber pad to prevent any vibrations getting to the unit (fig 12). It also makes it fit tighter in the car. I know this frame looks hokey. But it works real good. It slides in directly where the radio was. It is attached via two bolts that exist in the front of the car. Drill holes as shown in figure 9 in the frame. Open the two nuts in the Gallardo (look in, you will see them, they support the dash) and attach this frame. You can then slide the Eclipse unit in and out very nicely. It slopes downwards so the display is at the correct angle already.
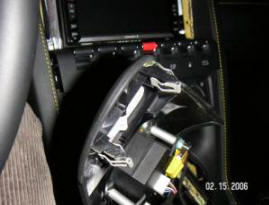
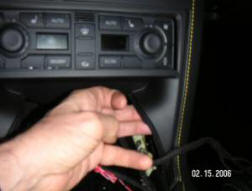
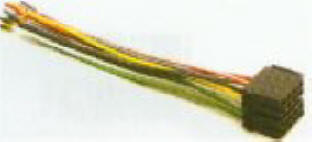
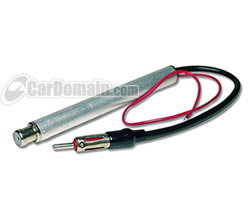
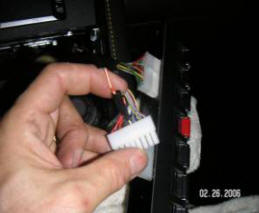
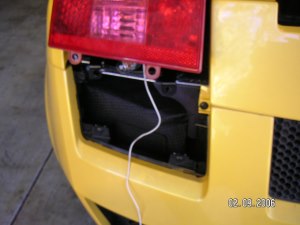
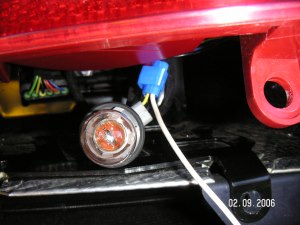
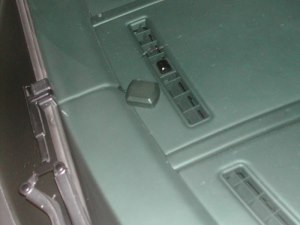
OK, now that we have the hardware in place we need to hook up the electrical connections. The Eclipse manual gives detail accounts of all wire connections, wire colors and functions etc. I will not go into great detail here. The first thing you need to do is to pick off the ignition power on lead, the ground lead and 12Volt battery lead. These go directly to the back of the OEM radio and are diagramed there (fig 13). Rather than hack up the OEM radio socket wires fortunately because it is a standard Audi radio you can get an adaptor socket/ wiring harness that fits into the OEM male sockets. Many auto stores have these. I got mine on the web at:- http://www.installer-data.com/aacars/car_data.php?carid=202 (fig 14). Check all voltages with a voltmeter with and without the ignition on. Once you have the ignition, power and ground leads connected check the unit lights up. You must insert the DVD software for the NAV display to even sign on. Next we will hookup the car radio antenna. There are two. One has a small socket. This lead is a feedback lead to the 4 antenna amplifiers that decide which directional antenna is currently providing the best signal for that station. It is a complex system used by Audi incorporating the Philips TEA6101/T "Antenna diversity circuit". The problem we have is that the Eclipse (ant most other radios) do not provide this feedback control. So we simply lead this wire loose. We ignore this one. The other larger one is the "normal" AM/FM antenna. However the socket is not the same as in US cars. Its -- you guessed it -- "European style" . On top of that, the signal from this antenna needs to be slightly amplified and provided with a small voltage bias to work properly. Fortunately this is a common problem an again there are standard parts to convert the antenna to a US plug socket with amplification. I got mine from http://www.cardomain.com/item/SCOVWA2B (fig 15). The red lead goes to the ignition lead. Next we hook up the speakers. These are indicated on the OEM radio (fig 11) and for the Eclipse unit. There are no rear speakers. Just front L and R as well as tweeters L and R. At this point you can check the radio. You should hear clear sound with no interface even with the engine on. The "Illumination input signal" is an input to the Eclipse unit that lets you know the headlights are on (i.e. it is dark). A +12v on this line will cause the display to switch over to "Night Time Colors". These are darker and less distracting at night. I tapped into the "lights on" switch (fig 16). Its the white/yellow wire. You also need an input for when the car is in reverse. This is only really required if you use the backup camera (see below). You can probably find an appropriate lead under the dash where the "R" button is in e-gear cars. However it is hard to get in there. I got the input by splicing a wire to the reverse lights at the back of the car. Just locate one of the two leads going to one of the reverse lights in the rear fender of the car. One lead is ground, the other will go to +12Volts when you put the car in reverse. Sorry I don't have a good picture for this, but to get to this light you need to remove the grill directly below the lights Fig 17, remove the two screws that hold the light assembly to the frame and gently push the lights up to get you hand in to grasp the light wires Fig 18. Then run the wire forward to the NAV unit through the engine firewall as I described in the rear radar installation write-up. Next we need to add the GPS antenna. This specialized antenna must be visible to satellites at all times. Ideally on the roof of the car. This would look ugly! By trial and error I find the sloping windscreen of the Gallardo allows the antenna to work well if it is placed at the base of the windscreen in the center of the dash. See figure 19.
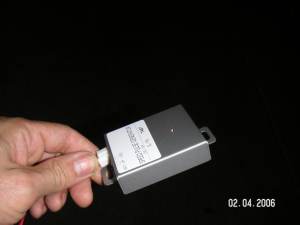
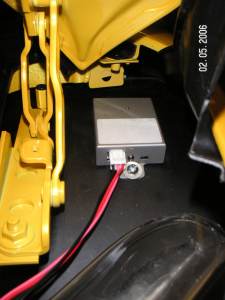
We are almost there. If you drive the car with the navigation system at this point (after it properly initializes and is configured to the right region location) it will work fine. As you drive along the arrow will follow your route quite well. However from time to time it will flash a message "speed sensor unavailable". More important it will not provide route guidance. The unit needs to be provided with a wheel speed sensor signal. Now on older cars this was easy. You could pick a signal from the "speed line" going to the odometer or the ABS computer. On recent Audi and Lamborghini cars this information is encoded in one of the three different CAN data likes that feed the computers and instruments of the car. After spending a lot of time with various adaptors that are made to read the CAN data bus for a speed signal with no success. (I could not locate the best spot to pick off the engine CAN data bus -- no Gallardo circuit diagram manual!). I found a simple reliable solution. At least two companies on the web sell a simple device that you place over a wheel of that is magnetized. As the wheel rotates it emits a signal. This signal feeds directly in to the Eclipse speed line. There are a few of these systems out there. The Alpine NVE-K300 unit is best known. I tried various locations. I found that the best location was directly above the front left wheel (fig 20,21). The rear wheels while larger seem to get stray magnetic signals from the alternator etc. The steel in the rubber tire is magnetized by a magnet provided. One side is set to North the other south. Takes about 5 minutes in all and lasts as long as the tire. If you rotate the wheel you will see the LED on the unit pulse (twice per rotation). I routed the wires for the unit into the interior of the car the same way I routed the leads of the front radar detector.
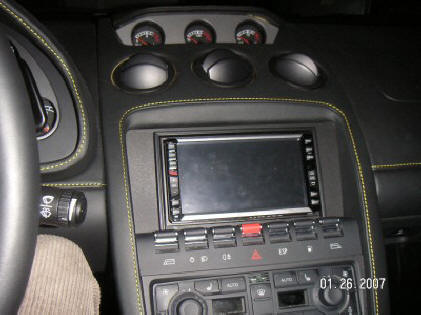
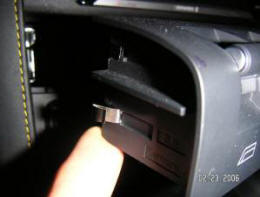
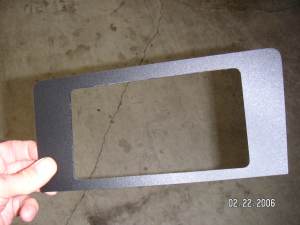
Test drive the car before you wrap things up. Check the navigation system provides voice commands properly. Test the CD player section of the unit and test the radio. All that then remains is to create a plastic bezel to fit around the unit. I had a local shop cut one out for me. It took 3 tries to get it right. The side angles are sloped. Figure 22 shows the bezel. It is made of polycarbonate plastic painted flat black plastic that exactly matches the rest of the cars interior. Done right it exactly snaps into place. Be sure the NAV screen can open and tilt when setting the internal cutout dimensions. Figure 1 shows the final setup. Note I have surrounded the NAV unit with a small picture frame to fill in some of the empty space around the sides of the unit.
For those of you that want a more elegant way of removing the Lamborghini radio, most car audio stores supply the special clips for removing Audio radios. These are shown in figure 23 and 24. You simply insert them in at the top and bottom sides where the clips are and pull the radio out. Remember once you insert these clips they cannot be removed without removing the radio itself. Note added later.
As with many car radios I found that the radio signal strength coming in through
(one of the 4 car directional antennas) is quite sensitive to the direction
the car is being driven for distant radio stations. Probably no surprise
since the OEM
However while there was a slight improvement the result was still not completely satisfactory.
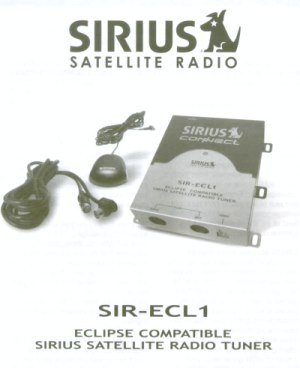
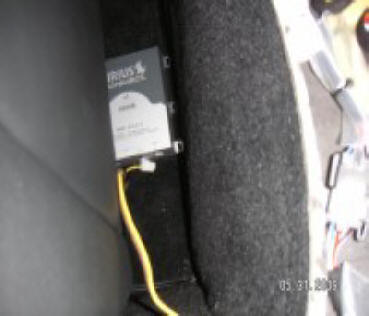
Attaching a Sirius radio system to an Eclipse NAV system Because of the above signal strength issues I decide to utilize the Sirius Satellite radio capabilities of the Eclipse NAV system. The Sirius unit costs ~$200 and plugs directly into a special socket at the back of the Eclipse unit. It automatically detects the Sirius radio which you must then activate via the web or a phone call. You get rock solid radio reception no matter where you are in the country for ~$110/year. I will never go back to the old AM/FM system! Figure 25 below shows a close-up of the Sirius radio unit. This unit is specifically made for many Eclipse NAV and radio systems. There are only two connections. One is a connection to the special Sirius antenna. This antenna is placed on the dash (about 2" away from the Alpine NAV antenna). Closer seems to give interference. The second connection is a special cable with sockets that directly go into the back of the Eclipse head unit and to the Sirius radio itself. You can place this box anywhere you like. Most would place it somewhere behind the Alpine NAV head unit deep within the dash. I have placed mine behind the passenger seat. This allows me to switch radios quickly and use one Sirius radio in two cars easily. Figure 26 shows such a Sirius radio setup.
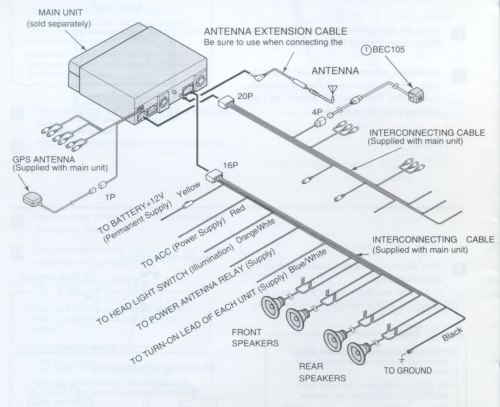
Attaching a Rear & Front View Backup Camera to an Eclipse NAV System One really nice thing about the Eclipse system is that it has the ability to add a backup camera to the system. When you put the car in reverse an image of what is behind you appears on the screen. Figure 27 shows how this camera is hooked into the Eclipse NAV system. The camera is called a BEC105 unit. It is a small cubic unit with a small lenses on one side.
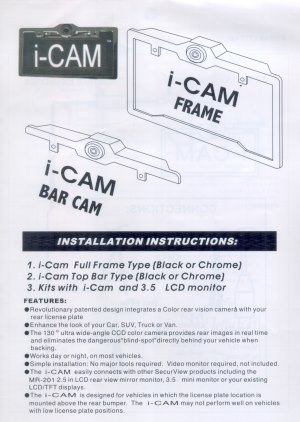
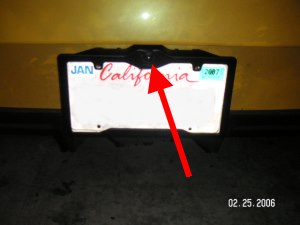
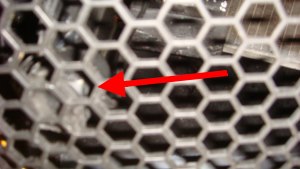
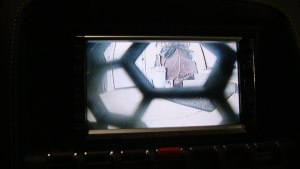
The problem we have is trying to find a place to mount the camera at the back of the car. The OEM Lamborghini unit is integrated nicely in the rear spoiler. Clearly that could not be done here. I came across a neat rear view camera system that actually has the camera located in the license plate frame (Fig 28). I think there are a few others like it out there. The problem is that they are not compatible with the camera input to the Eclipse unit. You can see a video picture from any camera but you have to select it from the screen menu - it will not automatically display a rear view image when in reverse. So this is what I did. I removed the camera unit from the i-CAM frame. Cut away some plastic and glued/molded the Eclipse BEC105 unit into the frame. I used a little epoxy and body filler to seal the unit in place. The unit is shown in figure 29 below. The single lead is run through a small hole in the rear bumper plastic behind the license plate, up to the top of the bumper on the inside across an along the side of the car frame through the firewall and into the passenger area. From there it is run through the center compartment of the car Figure 28. This is all described in detail here. For those with more time on their hands; you can also use the left over camera from the above i-CAM unit. I placed this camera just behind the left front radiator plastic grill (fig 30) beside the front radar detector unit. With this camera (manually selected) on the Eclipse unit I can get a close up view of the front bumper area of the car. This turns out to be very useful in parking lots where you wish to avoid scratching your front bumper by pulling up too close. Figure 31 shows a view of an image as seen from this front view camera. Sorry this image was taken without a flash and with poor lighting.
|
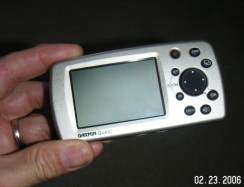 Again
there are a number of well known brands. I have had great success
with a Gremlin "Quest" unit. These days when I travel and rent
a car I always pack the unit. You download from a CD on your
computer data to the unit for the region/country you are going to be
driving in. I used it a lot on vacation in Europe. Saved my neck
many times! You stick it to your front windscreen and
plug the speaker into the cigarette lighter. Its surprisingly
accurate. The only disadvantage is the screen display is small and
you can never leave it visible if you park your car.
Again
there are a number of well known brands. I have had great success
with a Gremlin "Quest" unit. These days when I travel and rent
a car I always pack the unit. You download from a CD on your
computer data to the unit for the region/country you are going to be
driving in. I used it a lot on vacation in Europe. Saved my neck
many times! You stick it to your front windscreen and
plug the speaker into the cigarette lighter. Its surprisingly
accurate. The only disadvantage is the screen display is small and
you can never leave it visible if you park your car.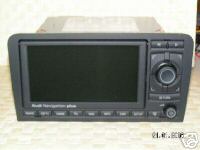 The
OEM system supplies with the Gallardo is clearly one way to go.
However only about 5-10% of the '04 and '05 cars seem to have this
system. It looks like it will be more common in the '06 and later
cars. If you have one in your car skip this article and don't even
think of swapping it out. The delta improvement in sound and NAV
capabilities are just not worth it. There are varying reports
as to whether the NAV harness is already in the '06 cars even if
they do not have the NAV installed. At least it was not in my late
model '05. The Gallardo NAV system looks identical to the Audi
A3 system (possibly others). I have considered the possibility of
putting an "eBay Audi A3 Nav system" in my car. There seem to
be a number advertised all the time. I have read the system is
difficult to configure and program but this should be confirmed.
The CD sign on probably comes up "Audi". I am even not sure if the
Lamborghini NAV software CD would work in the unit. However to get
the fit
and finish look would look good some work is needed. See
The
OEM system supplies with the Gallardo is clearly one way to go.
However only about 5-10% of the '04 and '05 cars seem to have this
system. It looks like it will be more common in the '06 and later
cars. If you have one in your car skip this article and don't even
think of swapping it out. The delta improvement in sound and NAV
capabilities are just not worth it. There are varying reports
as to whether the NAV harness is already in the '06 cars even if
they do not have the NAV installed. At least it was not in my late
model '05. The Gallardo NAV system looks identical to the Audi
A3 system (possibly others). I have considered the possibility of
putting an "eBay Audi A3 Nav system" in my car. There seem to
be a number advertised all the time. I have read the system is
difficult to configure and program but this should be confirmed.
The CD sign on probably comes up "Audi". I am even not sure if the
Lamborghini NAV software CD would work in the unit. However to get
the fit
and finish look would look good some work is needed. See 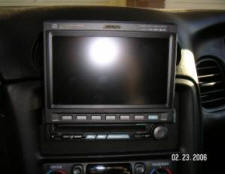 I
grew up with the Alpine system. I have had it in all 3 of my
Diablo's. Alpine in fact used the Diablo as its model car to
show the system when it first came out over 10 years ago. I have
since pulled one of those systems and installed it in my C5
Corvette. Today this system shows its age. They are 1 DIN height
units. The display comes out and then flips vertically. Now the one
place this is useful is if your original radio is small -- as was
the one in the Diablo. This is not a problem in the Gallardo.
In fact if anything the radio area is too big. If however you
wanted to have a NAV system in a Gallardo along with a 1 DIN height
I
grew up with the Alpine system. I have had it in all 3 of my
Diablo's. Alpine in fact used the Diablo as its model car to
show the system when it first came out over 10 years ago. I have
since pulled one of those systems and installed it in my C5
Corvette. Today this system shows its age. They are 1 DIN height
units. The display comes out and then flips vertically. Now the one
place this is useful is if your original radio is small -- as was
the one in the Diablo. This is not a problem in the Gallardo.
In fact if anything the radio area is too big. If however you
wanted to have a NAV system in a Gallardo along with a 1 DIN height
 The
system I went with was an AVN5435 Eclipse unit. These units
seem to be solid as a rock and can be found on the web for around
$1200. This unit has its software on a DVD. Eclipse also sells
hard disk based pricier version which is suppose to be faster. I
swore off hard disk based anything in cars since the disks simply
cannot seem take the vibration over time. I went through 2 old
Magellan hard disk based systems in the past. The unit is 2 DIN high
and contains everything in one 2 DIN unit. The DVD player, a CD
player, a radio and of course the NAV system itself. Its very
fast. Faster for re-routing that the Alpine for example. Best
of all the radio sound is excellent. I don't listen to the
radio/CD in my Gallardo a lot but if you do the Eclipse sound
quality is outstanding. All controls are entered by a touch
sensitive screen display. Finally for what it is worth the NAV
system itself (display, controls etc) is identical to that in the
Lexus model of cars. possibly others as well. Its made by
Fujitsu. So if you have a Lexus less things to remember!
The
system I went with was an AVN5435 Eclipse unit. These units
seem to be solid as a rock and can be found on the web for around
$1200. This unit has its software on a DVD. Eclipse also sells
hard disk based pricier version which is suppose to be faster. I
swore off hard disk based anything in cars since the disks simply
cannot seem take the vibration over time. I went through 2 old
Magellan hard disk based systems in the past. The unit is 2 DIN high
and contains everything in one 2 DIN unit. The DVD player, a CD
player, a radio and of course the NAV system itself. Its very
fast. Faster for re-routing that the Alpine for example. Best
of all the radio sound is excellent. I don't listen to the
radio/CD in my Gallardo a lot but if you do the Eclipse sound
quality is outstanding. All controls are entered by a touch
sensitive screen display. Finally for what it is worth the NAV
system itself (display, controls etc) is identical to that in the
Lexus model of cars. possibly others as well. Its made by
Fujitsu. So if you have a Lexus less things to remember!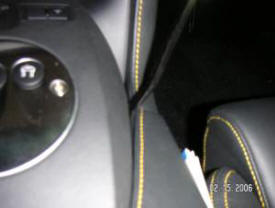


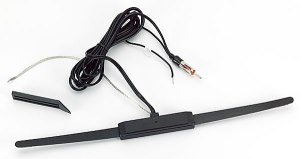 Audi radio would simply switch the antenna to one of the
other 3. I tried bypassing the cars internal
antennas completely and connecting the Eclipse radio to a generic glass
mounted AM/FM amplifier antenna such as this
Audi radio would simply switch the antenna to one of the
other 3. I tried bypassing the cars internal
antennas completely and connecting the Eclipse radio to a generic glass
mounted AM/FM amplifier antenna such as this