|

|
|
|
|
||
Hand Brake Switch Repair On Diablo's
A very common problem on Diablo's is that the handbrake "on light"
on the dash does not always go off when you release the handbrake. This
can often be corrected by raising the hand brake bar even tighter and
then releasing it. The bad news is that this gets worse with time. It
got to the point with mine that eventually it would not go our at all.
Fortunately it is not hard to permanently correct this problem.
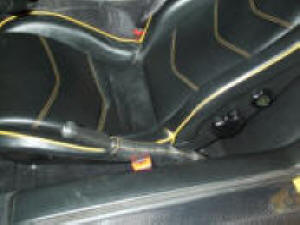
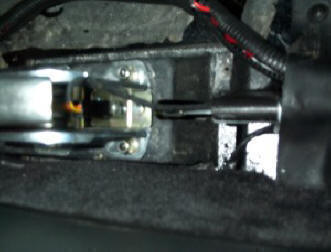
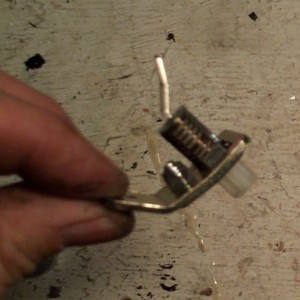
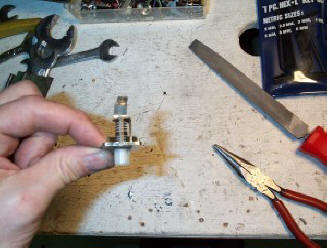
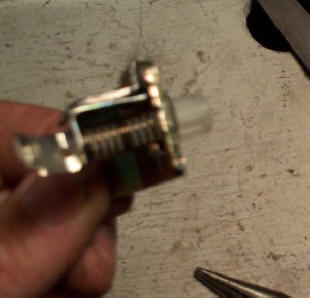
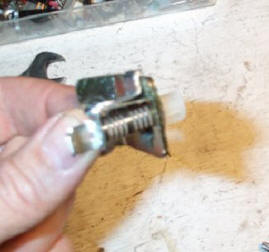
The problem lies in a switch that is directly behind the handbrake lever. Th get to this switch you must first remove the leather shoe cover around the handbrake handle. It is pinned down by four nuts one on each corner. The two outer ones (between the handle and the door) are a little difficult to get to. Use a socket wrench. The leather shoe can then be peeled up and over the hand brake handle. Take care not to tear or stretch the leather. Figure 2 shows the location for the contact switch. It is situated directly behind the switch leaver. Connected to it is a two wire socket. This socket can be disconnected by pulling upward. The switch assembly is attached to the base of the hand brake unit by a nut on the inside (between the switch and the hand brake leaver. Opening this nut allows the switch assembly to come out. Figure 3 shows the unit removed. . The switch is a simple spring loaded contact switch. It's difficult to describe, but the problem arises when the central moving part of the switch does not make proper contact with the top part of the switch. This happens when the top part of the switch becomes bent due to continious pressure of the spring on it. The solution is to reinforce the L shaped bracket that holds the spring in position. A piece of aluminum metal is bent to reinforce this L shaped bracket as shown in figure 4. It is bonded to the L shaped bracket using epoxy cement. The switch is tested for conductivity when opened and closed repetedly. The unit is then reinserted back into the car. Check the hand brake light a number of times before putting the leather cover back over the brake handle.
|
||||||||||||||||||||||||