|

|
|
|
|
||
Repair of Brake Light Switch
 |
Recently I noticed my rear brake lights were not
coming on when I pressed the brake pedal. Needless to say this is a very
dangerous situation in a Diablo with drivers always following you behind and
trying to keep up. The first thing one does in this situation is check the fuses. I opened the fuse box in the passenger side floor well and found fuse #25 (brake lights according to car manual) to be fine. Yet when I measured the voltage going to the two leads of the brake micro-switch (shown in figure 1) there was none. |
|
| Fig 1.Brake Light Contact Switch in a Lamborghini Diablo | This switch is a simple
on/off switch directly in line with power top the two rear brake lights. The
rear lights by the way have two filaments, one for a brake signal, another
for rear night driving red lights. There was no voltage to the bulb contact
for the brake light filament signal. |
|
|
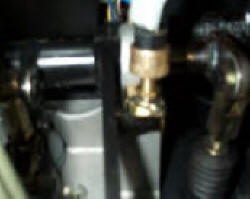
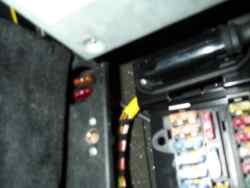
After some searching I found that there is a second
brake light fuse. This fuse is not located in the fuse box but is
situated to the top left outside the box as seen in figure 2. It is fuse
#30 according to the car manual. The top one was blown (The bottom one
is for the ABS system). Next what caused the fuse to blow.I removed the whole brake switch assembly as
shown in figure 3 and 4. It must have shorted internally because it no
longer would pass current when closed. The challenge was finding a
replacement. Rather than wait for an exact Lamborghini replacement - which
may not be that reliable anyway I looked around for a close match US
equivalent. I found one in a local auto store as shown in figure 5 below.
There are many of these. In both plastic and metal. I went for the closest
match, a "Standard SLS105" its available at NAPA auto stores as
part # SL158. The important point is that it be a "normally
closed" switch. When there is no pressure on the plunger (as
the case would be when the brake pedal is pushed), the switch is
“closed”, completing the circuit and activating the brake lights. This
is the “normal” condition from the switch’s perspective. Granted, when
you’re not pressing down on the brake, the switch is open. While this is
the “normal” condition (from the driver’s perspective), it is not the
“normal” position of the switch.
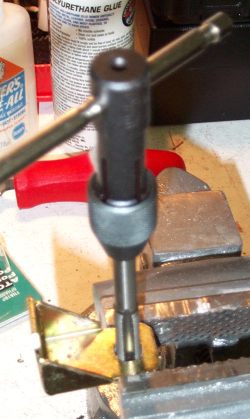
The only issue I had was the treads on the US one were a little larger than the Lamborghini one. The tap needed to thread the switch mounting bracket is a 10mm x 1.25mm pitch. (Thanks Rick Schue for this additional information). So I bored out the brass bracket to take up the slightly larger diameter US switch. This is easy to do with a tread borer as shown in figure 6. I the popped back in the switch and bracket and connected the two leads and hey presto I have brake lights again. Finally the new switch will need to be attached
to the existing wires by soldering or by using some crimp-on terminals.
I also was not able to locate the any plug to connect on the one from
the original Lambo switch; I had to cut the wires off at the switch. |
||
|
.jpg)
.jpg)
.jpg)