|

|
|
|
|
||
Koni Shock Repair For Lamborghini Cars
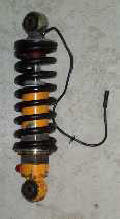 There are six heavy duty shock absorbers under a two ton Lamborghini Diablo or Murcielago. One for each front wheel and two for each rear wheel. This weight puts considerable strain on the six KONI shock absorbers of the car. The softness of these absorbers can be adjusted by the driver by means of "up/down" buttons in a ride control unit located near the gear shift leaver of the car. On cars post about 1994 the front shocks were modified with an elaborate oil pumping system which via a switch controlled by the driver the front of the car can be raised about 4 inches while parking etc. Much has been written about this system on this web site and on a number of other Lamborghini forum web sites. Suffice to say that the Koni shocks are perhaps the weakest link in Lamborghini cars. Numerous owners have complained about them leaking oil. Lamborghini has failed miserably to correct the problem. Compounding the problem is the fact that while the shocks are Koni shocks, Koni is not allowed to sell replacement shocks to Lamborghini owners (or repair them). They have to go through Lamborghini! These units have cost owners 1000's of dollars to replace over the years. By way of help, I should point out that there seems to be a general consensus that if you only use the shocks to raise the car when it is stationary or moving slowly Koni shock oil leaks are much less lightly to occur. Also try and avoid parking the car for extended periods of time in the raised position. The pressure on the oil seals to support this heavy car is enormous. You are inviting failure and leaks! So what does one do if you see a puddle of oil under the left or right side of your car. New shocks will set you back $1000's. Up to now that seemed to be the only option. In the past people have tried removing them to repair them. The problem they ran into was that it was essentially impossible to open the shocks up to replace the seals. Now for the first time we all have an alternative. Fortunately a fellow Lamborghini enthusiast John A. Custer who has submitted the following information you can try repairing your Koni shocks (or if need be, try asking him to do it for you). John can be reached at jcuster2@woh.rr.com (John also supplies a popular custom clutch rod for Diablo's. See Clutch rod for more information on this topic).
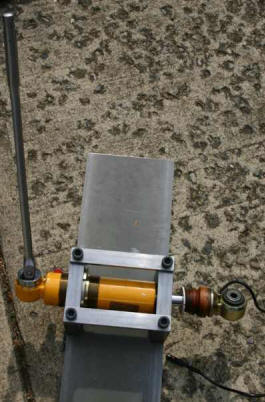
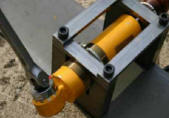
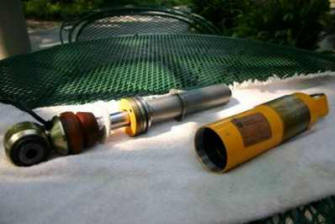
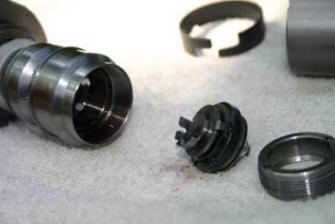
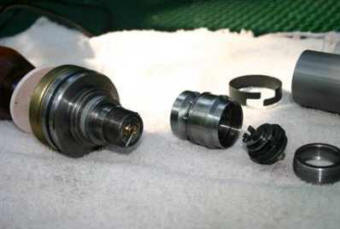
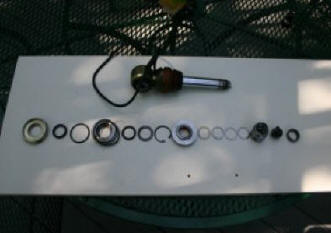
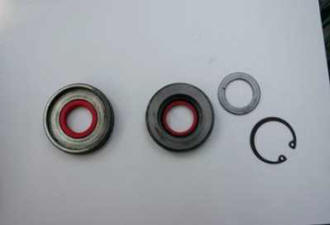
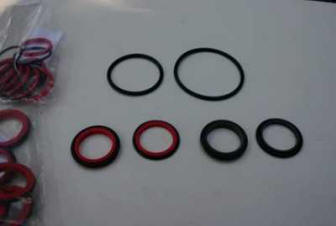
Rebuilding the Koni front lift shock. John believes that the shocks develop leaks because the factory seals are made of Teflon. Teflon is a great seal material but will not return to shape once stretched. He believes the lateral movement of the piston rod stretches the seal and caused the leak. He has developed special custom seals are made of urethane and are much more flexible and will return to there original shape if stretched. The first problem is to unscrew the top part of the shock and remove the piston with all of it parts. The top part is screwed into the bottom part extremely tightly. A special "Lock Tight" type of material was used to seal the assembly. Normal tools simply cannot be used to open the treads. John developed a special device shown in figures 1 - 3 which holds the bottom part of the shock while the top part is rotated open using the long leaver. If you look carefully you will see two holes in the top part of the shock (see the center of figure 4 where one in visible) that can be used to grab the shock and stop it from rotating in the device. Simple screws will do. These are shown (arrows) in figure 2. They must be strong steel. They are positioned so that when the shock is placed in the device these two pins fit into the small holes thereby preventing the whole shock from rotating when the other end is twisted open. Then using a spanner wrench remove the small ring that holds the valve that controls the dampening (fig 5). Then remove the shock piston. Note it has been assembled with lock tight and is extremely hard to turn. Notice also the stepper motor pin that controls the dampening valve. After removing the piston the parts containing the seals can be removed form the shaft. There are two shaft seals and two O rings that need to be replaced. The O rings are standard sizes. The shaft seals are not standard and have to be custom made. Figure 10 below is a picture of the seals. The lower right are the factory seals and the lower left are the custom urethane seals. The upper O rings are standard sizes. When reassembling be careful to get the dampening valve in the proper position and do not damage the O rings or seals. Also remember the whole shock needs to be refilled with oil. When filling with power steering oil remember to get all air bubbles out of the shock. Fill it and let the bubbles rise to the surface before putting it back into the car. Also see Repairs to Front Lifting system for more information on this topic.
|